
I’m a relatively new comer to the world of baking scones; my hand being ‘forced’ (quite nicely I hasten to add) as I launched my venture that is Chez Shamwari. And very pleased I am too to have discovered the delight of a warm scone straight out the oven with all the trimmings and a good cup of tea. This recipe is the only one I’ve ever made for my afternoon teas and have always had nothing but positive feedback from my guests. I have therefore not had much urge to seek out any other. I make no apology for the fact that there is no dried fruit, such as sultanas, or sugar in them. Once they have a healthy dollop of some fruity preserve topped with clotted cream, they don’t need any additional sweetness or doctoring, in my very humble opinion.
The recipe says to use buttermilk but this is not always readily available. You can substitute this by making up the quantity of buttermilk using half full fat plain yoghurt and half milk (semi skimmed or full fat – I wouldn’t recommend skimmed). I actually weigh out the quantity using the gram setting on digital scales, and split the quantities as follows: 63g of yoghurt and 63g of milk. Yes, this amounts to 126 and not the 125 stated in the ingredients list. I do this deliberately and this is because you always lose a bit of liquid in the pot that you mixed it in. In my experience, this little bit of liquid does make a difference to the making sure the dough is not too dry.
One other comment on the instructions below, it is important that the butter is cold, i.e. straight out the fridge. If it’s not and is too soft, it will be more difficult to work with when rubbing it into the flour.
And before I let you loose in your kitchens, I do want to mention that this posting is in particular honour to a certain partner in crime of ‘scone mischief’, who has helped validate the method below and made me aware of the points needing particular explanation. Thank you!
Ingredients
350g flour
1 tablespoon baking powder
pinch salt
100g cold unsalted butter
1 large egg
125 ml buttermilk
beaten egg or milk to glaze
Makes 8-10 using 6 cm cutter
Method
- Prepare a baking sheet with parchment and set aside.
- Prepare some beaten egg or milk in a small container for glazing and set aside.
- Heat the oven to 220C.
- Whisk together the egg and buttermilk and set aside.
- Chop the butter into small cubes.

Cut the butter into small cubes
- Put the flour, baking powder, salt and butter into a food processor. Whiz until the mixture resembles a very fine flour mixture.
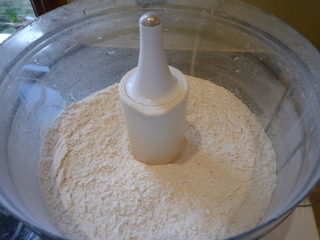
Whiz the flour, salt, baking powder and butter until very fine
- Pour the flour mixture into a large bowl.

Put the flour and butter mixture into a large bowl
- If you don’t have a food processor, put the flour, baking powder and salt into a large mixing bowl. Grate in the butter and rub it in until it resembles a fine breadcrumb type texture.
- Add the buttermilk mixture.
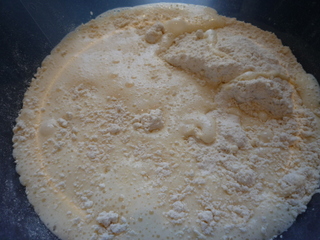
Add the buttermilk mixture
- Using a metal knife (one that you would use to eat food with – not a sharp cutting knife) and stir in the liquid until it starts to combine.

Stir with a metal knife
Stir with a metal knife until it starts to combine
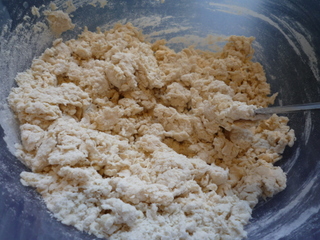
- It may look like the dough is going to be too dry at this stage. Don’t be tempted to add any more liquid as it will all come good eventually.
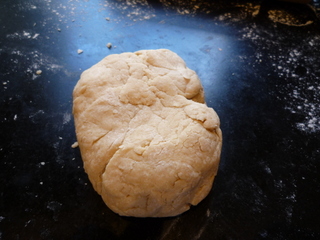
- Then using your hand, work the dough to combine it further into a firm but soft dough and it forms a ball.
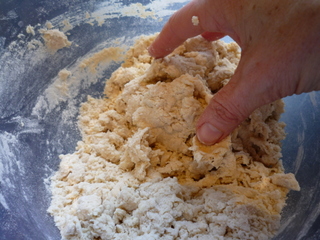
Using your hand gently work the dough by pressing it together

Gently work dough into a ball
- You don’t want to knead the dough at all otherwise this will make it tough.
- Lightly flour your work surface and place the dough onto it. Lightly press it down to flatten it slightly. Again, no kneading!

Turn dough onto lightly floured surface
- Using a rolling pin, lightly roll the dough until it is about 2.5 cm (or one inch) in thickness, turning a ¼ turn after each roll to achieve an even thickness. Be careful to push in the edges if cracks appear as you roll and turn the dough.

Roll out dough and cut into rounds
- Take a 6cm round cookie cutter and dip it in a little flour. Cut out rounds of scones and place them on the prepared baking tray being sure to leave sufficient space between then as they do rise and expand on cooking.
- When cutting out, be careful not to twist the cutter as this will cause a distorted rise on baking.
- Any remaining dough can be combined gently together again with your hands, gently re-rolled and further rounds cut out. These particular scones may not be so perfect in shape due to reworking the dough again.
Recombine any left over dough and roll again and cut out further rounds
- The remaining bit is best to recombine gently with your hands into a round; it will bake into a funny shape but no less delicious.
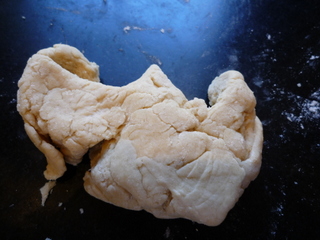
Small left over bits like this can be shaped into a round by hand
- Using a pastry brush, lightly brush the tops of the scones with the egg wash.
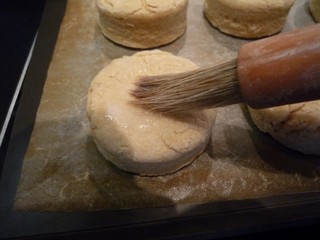
Brush the tops with beaten egg or milk
- Place in the oven and bake for 10 minutes until risen and golden brown.
- If you wanted to make slightly bigger 7cm rounds then I recommend cooking time is 12 minutes
- Once baked, remove from the oven and place on a cooling rack.

- Serve while still warm with jam and clotted cream. Yum!

These scones freeze very well. Make sure they are completely cold before wrapping in a freezer bag and popping them in the freezer. When you are ready to use them, remove them from the freezer bag and leave on a plate covered with cling film (so they don’t dry out) and leave to defrost completely. When they have fully defrosted heat the oven to 200C. Put the scones on a baking tray and warm in the oven for 5 minutes only. They are now ready to serve!
Thank you so much for the terrific practical tips to help our confidence in the kitchen! You should write a cookery book about doing the simple things well! I would say that the point where you put the whizzed flour and butter in to another bowl is a really very helpful one as I found it difficult to remove a moist scone dough from the magimix when I first tried scones! (Also not totally safe trying to get mixture off the blade!) It is so clear that your method shows that being prepared pays off and speeds up the time to testing delicious scones!! YUM!! 🙂
Thanks for the comments Jo. Here’s to more scone mischief 🙂